root@ubuntu910:~# uname -a
Linux ubuntu910 2.6.31-20-generic-pae #58-Ubuntu SMP Fri Mar 12 06:25:51 UTC 2010 i686 GNU/Linux
安裝這些
apt-get update

apt-get upgrade

apt-get install gcc make binutils libaio1 gawk ksh libc6-dev rpm libmotif3 alien lsb-rpm libtool
root@ubuntu910:~# whereis awk
awk: /usr/bin/awk /usr/lib/awk /usr/share/awk /usr/share/man/man1/awk.1.gz
root@ubuntu910:~# whereis rpm
rpm: /usr/bin/rpm /usr/lib/rpm /usr/share/man/man8/rpm.8.gz
root@ubuntu910:~# whereis basename
basename: /usr/bin/basename /usr/share/man/man1/basename.1.gz
修正這些 bin 的 path , oracle 10g
ln -s /usr/bin/awk /bin/awk
ln -s /usr/bin/rpm /bin/rpm
ln -s /usr/bin/basename /bin/basename
設定帳號 / group 及建目錄
addgroup oinstall
addgroup dba
addgroup nobody
usermod -g nobody nobody
useradd --create-home --home-dir /home/oracle --gid dba --shell /bin/bash oracle
usermod --groups admin oracle
chown -R oracle:dba /home/oracle
mkdir -p /u01/app/oracle
chown -R oracle:dba /u01
chmod -R 755 /u01

# 改一下 oracle 的 password
passwd oracle
修改 LINUX OS 系統參數 /etc/sysctl.conf
fs.file-max = 65535
kernel.shmall = 2097152
kernel.shmmax = 2147483648
kernel.shmmni = 4096
kernel.sem = 250 32000 100 128
net.ipv4.ip_local_port_range = 1024 65535
net.core.rmem_default = 1048576
net.core.rmem_max = 1048576
net.core.wmem_default = 262144
net.core.wmem_max = 262144
及 /etc/security/limits.conf
oracle soft nproc 2047
oracle hard nproc 16383
oracle soft nofile 1023
oracle hard nofile 65535
vi ~oracle/.profile
#
#
export ORACLE_BASE=/u01/app/oracle
export ORACLE_HOME=$ORACLE_BASE/product/10.2.0/db_1
export ORACLE_SID=orcl
#
PATH=$ORACLE_HOME/bin:$PATH:$HOME/bin
export PATH
#
unset USERNAME
#
#
reboot ubuntu 讓 OS tunning 參數生效
用 oracle 帳號login
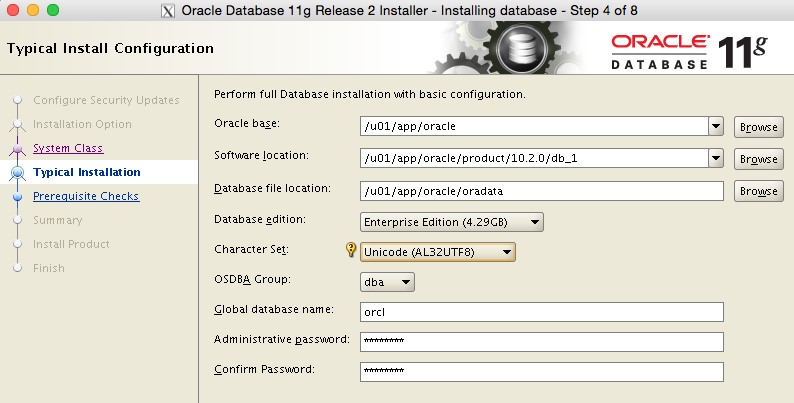
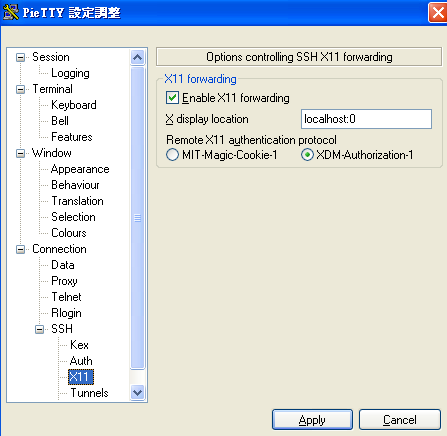
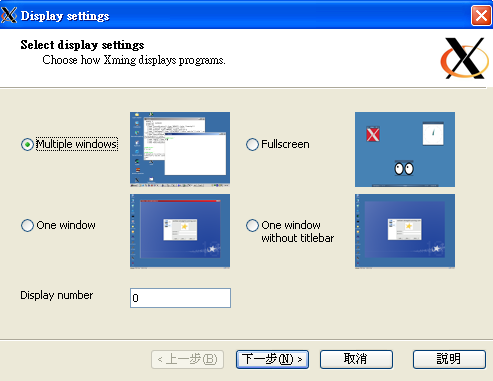
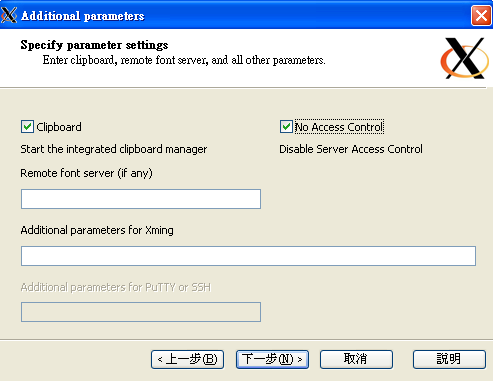
搞定 X window 或在 ubuntu 圖型界面下開始安裝 oracle
X window 參考: https://www.monster.com.tw/archives/1098
圖形界面參考: https://www.monster.com.tw/archives/1709
2015.0211 : OS X REF.: https://www.monster.com.tw/archives/7097
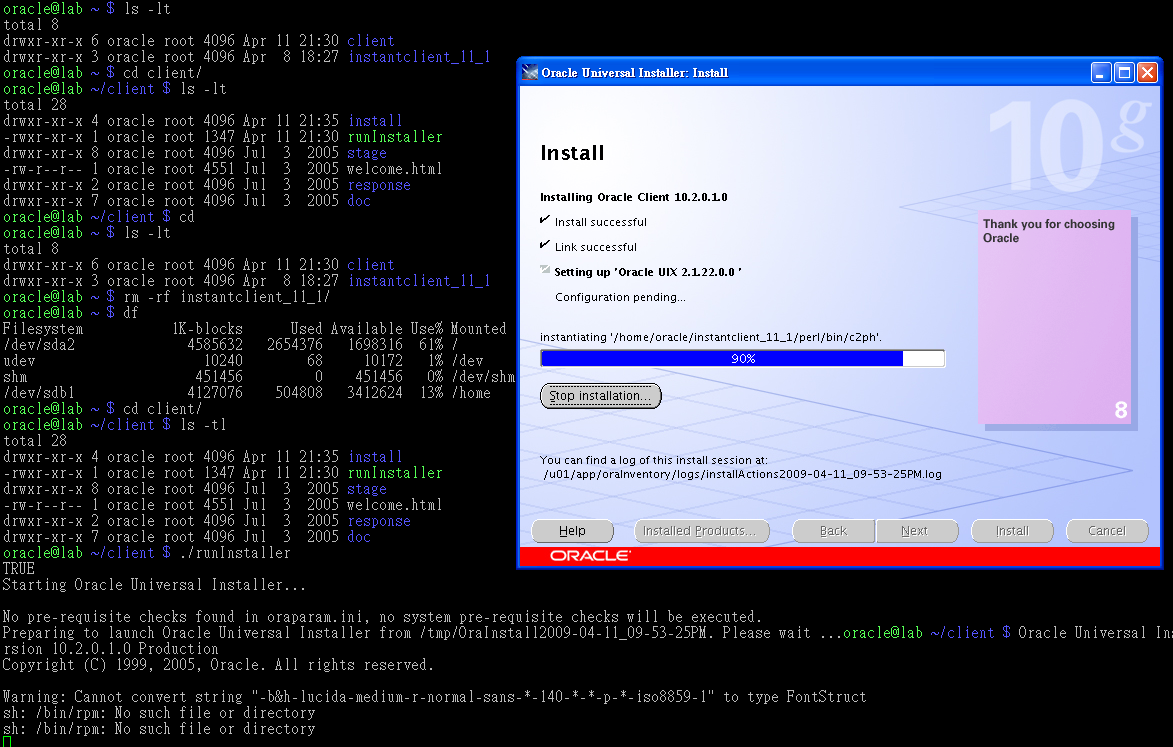
cd /database 後下:
./runInstaller -ignoreSysPrereqs
// ———————————————-
遇到這個問題
INFO: gcc: /usr/lib/libstdc++.so.5: No such file or directory
INFO: /u01/app/oracle/product/10.2.0/db_1/bin/genorasdksh: Failed to link liborasdkbase.so.10.2
INFO: make: *** [liborasdkbase] Error 1
cd /usr/lib

ls -l libstdc++*
lrwxrwxrwx 1 root root     19 2010-04-17 22:14 libstdc++.so.6 -> libstdc++.so.6.0.13
-rw-r--r-- 1 root root 962800 2010-01-10 23:53 libstdc++.so.6.0.13

#
ln -sf libstdc++.so.6.0.13 libstdc++.so.5
遇到這個問題
/u01/app/oracle/product/10.2.0/db_1/oc4j/j2ee/OC4J_DBConsole…. not found
.
.
.
oracle@ubuntu910:~$ netstat -an |grep LIST
tcp        0      0 127.0.0.1:6010          0.0.0.0:*               LISTEN
tcp        0      0 0.0.0.0:3938            0.0.0.0:*               LISTEN
tcp        0      0 0.0.0.0:1158            0.0.0.0:*               LISTEN
tcp        0      0 0.0.0.0:5520            0.0.0.0:*               LISTEN
tcp        0      0 0.0.0.0:1521            0.0.0.0:*               LISTEN
tcp        0      0 0.0.0.0:33044           0.0.0.0:*               LISTEN
tcp        0      0 0.0.0.0:22              0.0.0.0:*               LISTEN
tcp        0      0 127.0.0.1:631           0.0.0.0:*               LISTEN
tcp6       0      0 ::1:6010                :::*                    LISTEN
tcp6       0      0 :::22                   :::*                    LISTEN
tcp6       0      0 ::1:631                 :::*                    LISTEN
unix  2      [ ACC ]     STREAM     LISTENING     4621     /var/run/cups/cups.sock
unix  2      [ ACC ]     STREAM     LISTENING     3998     @/var/run/hald/dbus-W4TPdf1r7s
unix  2      [ ACC ]     STREAM     LISTENING     2677     @/com/ubuntu/upstart
unix  2      [ ACC ]     STREAM     LISTENING     6110     /var/tmp/.oracle/sEXTPROC0
unix  2      [ ACC ]     STREAM     LISTENING     6108     /var/tmp/.oracle/s#1165.1
unix  2      [ ACC ]     STREAM     LISTENING     6112     /var/tmp/.oracle/s#1165.2
unix  2      [ ACC ]     STREAM     LISTENING     3610     @/var/run/hald/dbus-Empv97RMbr
unix  2      [ ACC ]     STREAM     LISTENING     3564     /var/run/dbus/system_bus_socket
PS note:
- 開機時自動啟動 oracle database 及 listener – http://www.akadia.com/services/ora_linux_install_10g.html
- .
其他相關的檔案/設定:
monster@ubuntu910:~$ cat /etc/fstab
#
/dev/sdb1               none            swap            sw              0 0
/dev/sdc1 /u01 ext2 rw 0 0

monster@ubuntu910:~$ cat /etc/hosts
127.0.0.1       localhost
172.30.0.48     ubuntu910.monster.tw    ubuntu910

#
default 有這幾個 tablespace
SQL> select tablespace_name from dba_tablespaces;

TABLESPACE_NAME
------------------------------
SYSTEM
UNDOTBS1
SYSAUX
TEMP
USERS

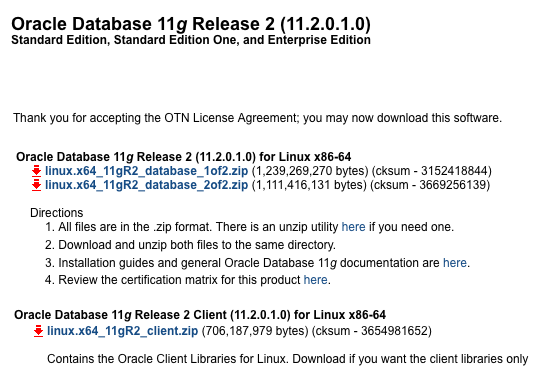
/u01 這個 partition 至少要 4.7G
所以最好另建一個 partition 來放 Oracle 11gR2 的 install package …