Contents
The Basic Setup
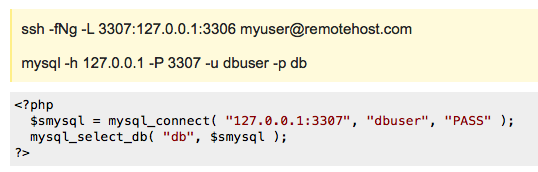
To set up a tunneled connection to a MySQL server at remotehost.com, you can issue the following two commands on any client:
ssh -fNg -L 3307:127.0.0.1:3306 [email protected]
mysql -h 127.0.0.1 -P 3307 -u dbuser -p db
The first command tells ssh to log in to remotehost.com as myuser, go into the background (-f) and not execute any remote command (-N), and set up port-forwarding (-L localport:localhost:remoteport ). In this case, we forward port 3307 on localhost to port 3306 on remotehost.com.
The second command tells the local MySQL client to connect to localhost port 3307 (which is forwarded via ssh to remotehost.com:3306). The exchange of data between client and server is now sent over the encrypted ssh connection.
To make the same connection using PHP’s built-in MySQL client:
<?php
 $smysql = mysql_connect( "127.0.0.1:3307", "dbuser", "PASS" );
 mysql_select_db( "db", $smysql );
?>
Server Configuration
Obviously, this approach requires that you have a shell account on the remote (database) server that you can log into in order to set up the forwarded port. And it requires a MySQL login that is allowed to connect to the database in question from host 127.0.0.1
On the database server, as root, create a user to handle the server side of all tunnels. This user will have no valid shell (might not work on all operating systems?)
useradd -s /bin/false myuser
mkdir /home/myuser/.ssh
touch /home/myuser/.ssh/authorized_keys
chown -R myuser:myuser /home/myuser/.ssh
chmod 755 /home/myuser/.ssh
chmod 600 /home/myuser/.ssh/authorized_keys
Connections via the tunnel will look like they are coming from 127.0.0.1, so you need to update the GRANT tables in the database:
USE mysql;
GRANT ALL ON db.* TO [email protected] IDENTIFIED BY 'PASS';
FLUSH PRIVILEGES;
Congrats, your server is ready to accept tunnels.
Client Configuration
Because you won’t be around to type a password, you’ll need to set up an RSA key pair for ssh on each client ( more
).
The first step is to set up an RSA key pair as root on each client, leaving all questions blank:
root@local# ssh-keygen -t rsa
 Generating public/private rsa key pair.
 Enter file in which to save the key (/var/root/.ssh/id_rsa):
 Enter passphrase (empty for no passphrase):
 Enter same passphrase again:
 Your identification has been saved in /var/root/.ssh/id_rsa.
 Your public key has been saved in /var/root/.ssh/id_rsa.pub.
 The key fingerprint is:
 23:02:1b:f7:55:2b:35:cf:0c:5d:ad:21:c7:e1:78:ca [email protected]
root@local#
The next step is to append the rsa public key file to myuser’s .ssh/authorized_keys on the server. First we copy the key, then we shell in and append it to the authoized list:
root@local# scp /var/root/.ssh/id_rsa.pub [email protected]:/tmp/myhost.local_rsa.pub
root@local# ssh remotehost.com
...
root@remote# cat /tmp/myhost.local_rsa.pub >> /home/myuser/.ssh/authorized_keys
root@remote# exit
Now you can set up the connection on the client, without typing myuser’s password:
root@local# ssh -fNg -L 3307:127.0.0.1:3306 [email protected]Making It A Daemon
A quick and dirty way to make sure the connection runs on startup and respawns on failure is to add it to /etc/inittab and have the init process (the, uh, kernel) keep it going.
Add the following to /etc/inittab on each client:
sm:345:respawn:/usr/bin/ssh -Ng -L 3307:127.0.0.1:3306 [email protected]And that should be all you need to do. Send init the HUP signal ( kill -HUP 1 ) to make it reload the configuration. To turn it off, comment out the line and HUP init again.